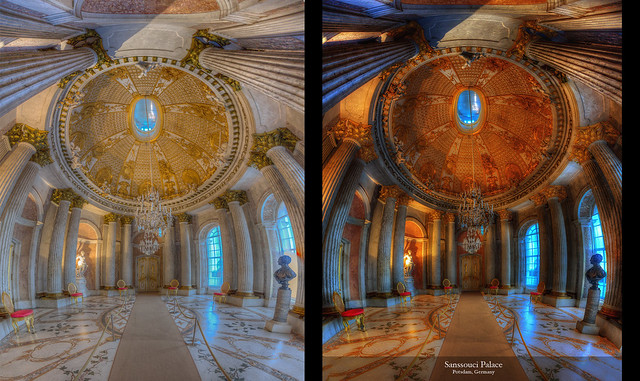
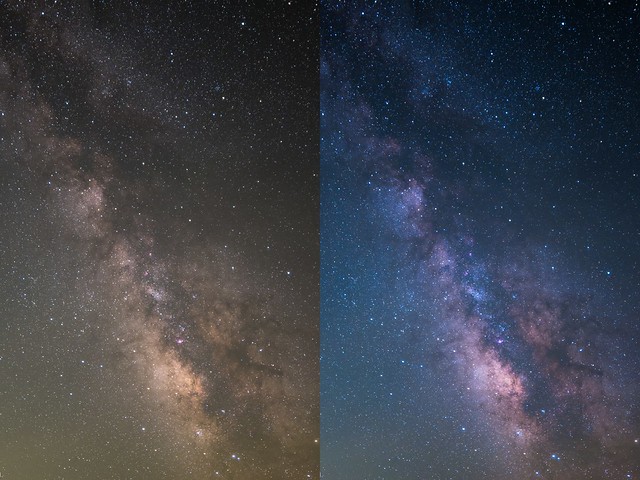
Bracketing is a standard feature on nearly every camera produced these days, from high end mirrorless ILCs and DSLRs to point and shoot cameras to mobile devices. It used to be that bracketing referred exclusively to exposure, but now it’s something of an umbrella term that can apply to a number of other camera settings. Keep reading as we take a quick look at some of the uses of your camera’s bracketing functions.
Exposure Bracketing
Bracketing is the process of capturing multiple takes of the same scene, applying slightly different settings to each capture. So, in the case of exposure bracketing, you can set your camera to shoot typically between 3 to 5 shots, each at a different exposure. Lets say your camera is set up for 3-shot exposure bracketing. The first shot taken will be the baseline shot and each subsequent shot will be taken at one stop above and one stop below the baseline. In short, you’ll get one “correctly” exposed image, one slightly overexposed image and one slightly underexposed image. Of course, depending on what your camera allows, you can change the EV interval (+/- 1/3 or +/- 2/3, for example) and how many total exposures you want.
Why would you want to use exposure bracketing? Well, the primary reason has to do with dynamic range. Dynamic range in this case refers to the difference between the darkest and lightest areas of a scene — a bright sky and a not-so-bright foreground, for example. This is the type of scenario that a single photo generally won’t be able to handle. If you expose for the sky the foreground will be severely underexposed; if you expose for the foreground the sky will be blown out. But if you take three or more shots at different exposure values and then combine those individual images in post processing using the best bits of each, you will gain a final image that is perfectly exposed top to bottom.
One important note about exposure bracketing — you will get the best results if you use a tripod to keep your camera stationary. It’s possible to do it handheld, but you run the risk of ending up with misaligned shots.

Photo by Harry Pherson on Flickr
Focus Bracketing
In the same way that exposure bracketing can create photos that exhibit greater dynamic range, focus bracketing can produce photos exhibit greater depth of field and detail — qualities that macro photographers are often in search of. Even when you use the minimum aperture (say, f/22), it still may not provide the breadth of focus you’re looking for. One solution to this is to use focus bracketing, a technique that works by capturing several images at different focal points along the subject. A tripod is necessary because you want to keep the subject in the same position throughout the shooting process. Exposure will be constant; only focus will change. There are currently only a small handful of cameras on the market that feature a focus bracketing option (including several of Olympus’ OM-D line of Micro Four Thirds bodies). Furthermore, to complete the bracketed image you will need to stack them in post-processing (the Olympus OM-D E-M1 can do this in-camera).

Photo by Eike Biel on Flickr. Image created by focus bracketing and stacking.
White Balance Bracketing
White balance bracketing allows you to take multiple images of a scene at various color temperatures. This might be useful in mixed lighting situations where auto white balance doesn’t work so well. If you’re shooting raw, however, you won’t need to bracket white balance as it can always be changed later.

Photo by Stephen Rahn on Flickr
Flash Bracketing
With flash bracketing you can take several photos of a subject at varying levels of light intensity from a built-in (pop-up) flash or a speedlight. This can be useful particularly in lowlight settings when you aren’t sure what amount of flash will properly expose your photo. Flash bracketing is also used by some interior photographers to get perfectly lit rooms while keeping aperture and ISO constant.

Photo by William Bayreuther on Unsplash
Final Thoughts On Different Kinds Of Bracketing
Take a look through your camera settings and see what kinds of bracketing are available to you. In addition to those listed above you might find ISO bracketing, filter/scene bracketing, etc. While in-camera bracketing makes things convenient, don’t feel left out if your camera doesn’t automate one or more of these bracketing types — you can achieve the same things manually.
4 Kinds Of Bracketing You Can Do With Your Camera was originally posted by proton T2a
No comments:
Post a Comment